Postcards: DraftThe actual design of the postcard starts on the 'Editor' tab. On the left side you will find the page selection, the settings and the postcard elements. The right side shows a postcard preview with your content elements. Page selectionUse the 'Pages' selection to switch between the different pages of your postcard.
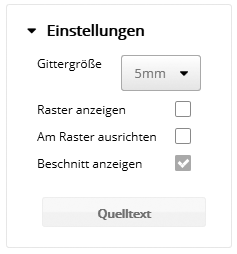
SettingsUnder 'Settings' you can set a grid size. If you select 'Show grid', the grid is displayed in the postcard preview.
Postcard elementsThe following 'Elements' are available for the graphic design of your postcard: When you create a new element, you can define an alignment to the work space and a distance to the page margin in addition to the settings. Text elementA new window opens in which you can enter the text in the input field provided. Various formatting settings are available for a text, such as font, font size, text alignment, text color, line spacing, line width and angle. If you format your text, the formatting applies to the entire text element. You cannot format individual lines differently. To do so, you would have to create a new text element. Image elementIf you want to insert an image, it must already be in the media administration. For more information on the media administration, see section 6.4. A new window opens in which you can select the image from the 'Media administration' and insert it. Then set the 'Width', 'Height' and 'Angle' of the image.
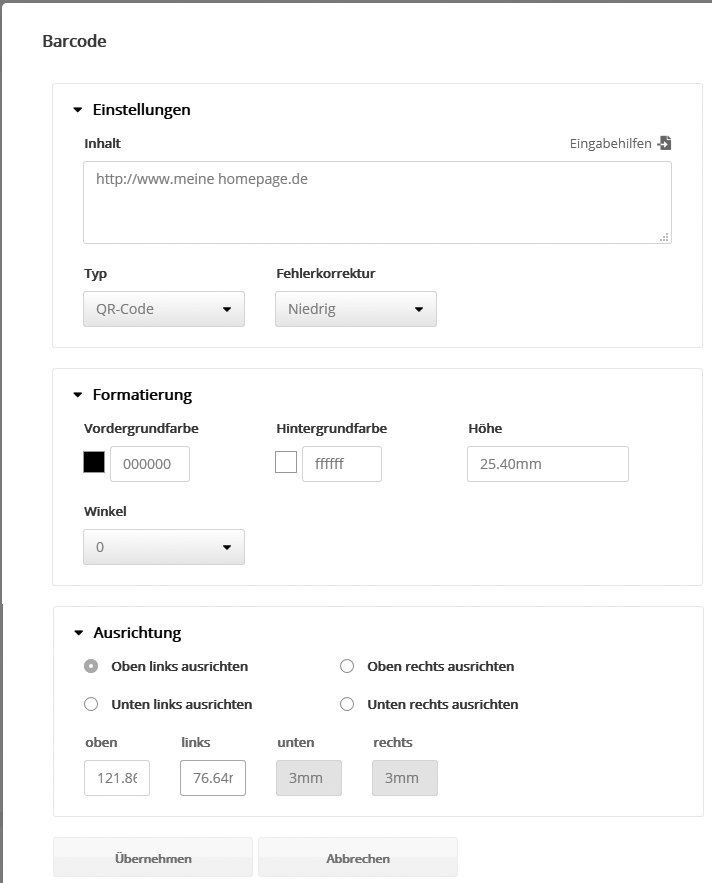
Click the 'Apply' button to save the image. Color area elementAfter you have clicked the color area element, a new window opens. Here you define the 'Name' and the 'Color'. You can enter a color code directly or select a color from the color field. Use 'Width' and 'Height' to set the size of the color area. Finally, click 'Apply'. Barcode elementThe following window opens:
Enter your barcode in the input field and select the corresponding 'Barcode type'. Barcode types include, for example, QR code, Code 128, Code 39 Full ASCII, EAN-8 etc.
|