Blacklist: Email
|
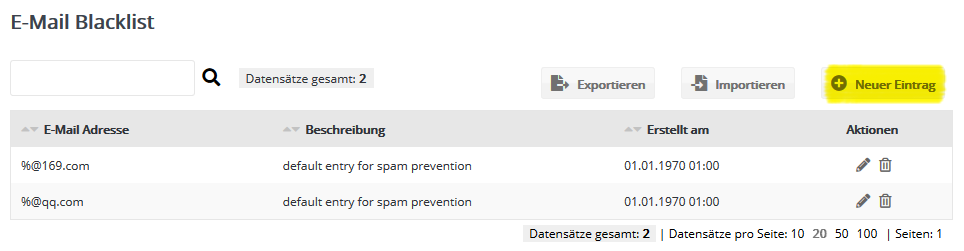
The email blacklist is the easiest way to exclude email addresses or entire domains from receiving any mailings. Examples:
Email addresses and domains on the blacklist are excluded from every send, even if such an address is contained in your subscriber lists. Even a new newsletter opt-in does not change this. You can delete a blacklist entry at any time, for example if the recipient explicitly asks you to. A possible addition to the blacklist, which applies to all mailings, is to create exclusion lists. You can then select the exclusion list you want on the send tab of each individual mailing as needed. Blacklist matching removes subscribers with blacklisted addresses from your subscriber lists. This is not technically necessary, but regular list hygiene makes it easier to plan your target groups with realistic subscriber numbers. --> Note: The matching takes both internal and external blacklists into account. In addition to the blacklist of your own account, addresses are matched against the blacklist of the parent admin account and the global emma blacklist. They are also matched against the blacklist of RTR GmbH under the Austrian E-Commerce Act (§ 7 ECG) if the option of the same name is activated in the "Extended settings" tab of the account. Recipients can add or remove their own email address on this external blacklist themselves. After your newsletter has been sent, the number of blacklist entries concerned is shown in the email statistics. Creating a new blacklist entryClick 'New entry' and enter the email address. Optionally, you can add a description to the email address for your own reference.
In addition to individual email addresses, you can also add entire domains to the blacklist, for example to exclude the addresses of competitors or trash mail services. For example, the entry %@example.com excludes all email addresses of the domain "example.com". Optional pseudonymization (hashing)To strengthen data protection, you can optionally store blacklist entries in pseudonymized form instead of plain text. During sending, we match them by pseudonymizing each recipient's email address for the check and comparing it with the pseudonymized blacklist entries.
You have two options to store blacklist entries in pseudonymized form:
ImportYou can 'import' email addresses from a CSV file into the blacklist. 
The only mandatory content of the CSV file is one column with the email addresses of the blacklist entries. In column 2, you can add a single-line text description for each entry. Column 3 contains the time of the blacklist entry in ISO format YYYY-MM-DD HH:mm:ss (at least the date must be present). If no time is entered, the current time is used automatically. Then select the import type 'Add' or 'Replace'. 'Replace' deletes the existing blacklist entries, 'Add' copies the new entries into the list regardless of the existing ones. ExportThe 'Export' menu item saves the blacklist as a CSV file on your computer, where it is available for further editing. |