


Modules: Media administration
In the media administration, you upload files of all kinds to the emma server so that you can then embed them in your mailings, link to them or use them as attachments. These include images, PDF documents or ZIP files.
Compared with uploading to the Webspace, the media administration offers the following advantages:
- the existing folder structure of your account is used, taking into account the folder access rights of different user roles
- image editing functions are available, such as cropping, rotating and scaling
- the system assigns each file a unique ID, so that the file embedded in a mailing keeps working even after it is renamed or replaced
You can switch the view of the existing files between thumbnail view and list view:
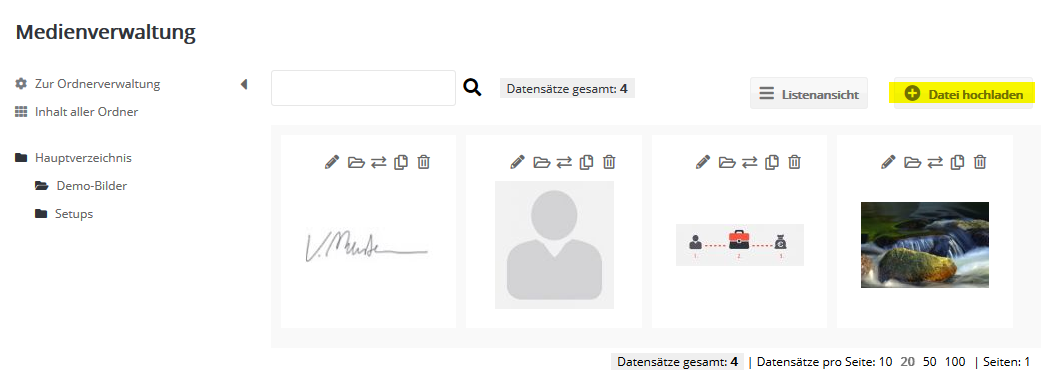
To edit a file you have already uploaded, click the 'Edit' icon of the file. Here you can rename the file, replace it with a newer version or copy the link URL under which the file is stored.
Depending on the file type, the media administration offers additional functions:
- ZIP files can be opened and unpacked, so you can conveniently upload several images including their directory structure.
- Images (JPG, PNG, GIF) can be adapted to your newsletter in a few clicks thanks to the integrated image editing. In many cases, this saves you the detour via external software and repeated saving and uploading.

Click the 'Move' icon to move files to other folders. Use 'Open folder' to go to the corresponding subfolder.
Uploading a file
In the pop-up window that appears, click 'Browse...' to select the file on your computer that you want to upload.
You can upload all file formats to the media administration, with various uses as:
- images of a mailing or a landing page
- file attachments of a mailing
- linked downloads stored on the emma servers
Image editing
Image editing functions are available on several tabs:
Properties
Here you get an overview of the stored information, such as name, file type and image size. You can change the name and copy the link to the file, for example to embed it in a newsletter.

Rotate
This tab contains both the 'Rotate' and the 'Flip' function. The two upper buttons rotate the image 90 degrees to the right or to the left. You also decide whether the image should be cropped automatically when rotating or whether a frame should be created, which you can color as you like.

Scale
You can decide whether to keep or ignore the aspect ratio when scaling. You can then drag the small square at the bottom right edge of the image with the mouse as you like, or change the size manually in the 'Width' and 'Height' fields.
Crop
The crop mode lets you adjust the size of your image as you like. Three different modes are available:
free: Use the mouse pointer to drag any section of your image.
fixed size: Set a fixed width and height and move the section to any position you like.
fixed aspect ratio: Set a fixed ratio of width to height.

Frame
You can give your image a frame of any color and width. You can also specify whether the frame should surround the entire image or, for example, only appear at the right and left edges of the image.

Overlay
On this tab, you can place a graphic over one or more images, such as a "New" label or the play button of a video thumbnail.
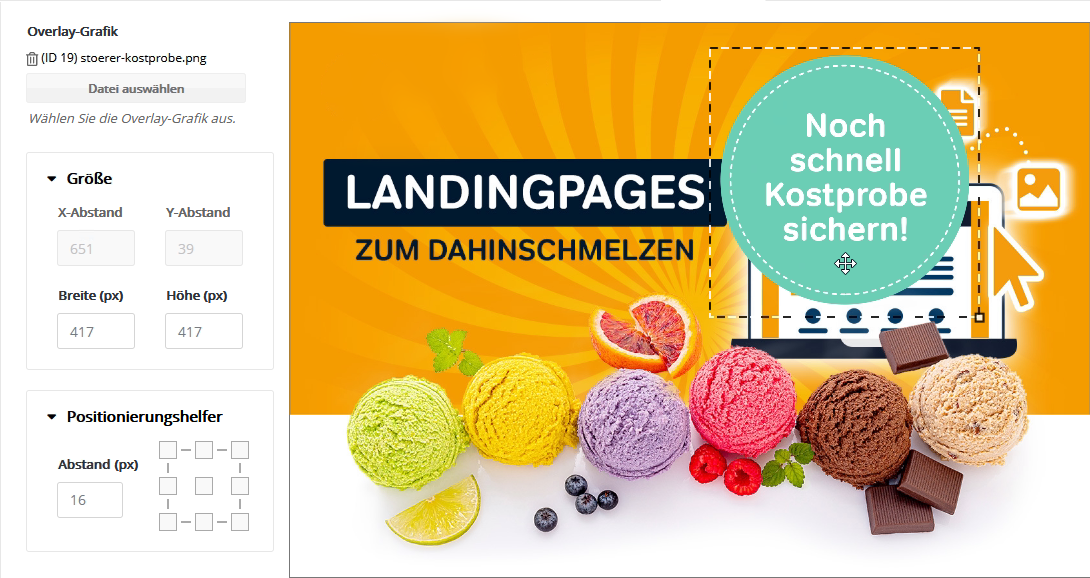
Upload the overlay image you want to the media administration. Then select the overlay image.
Tip: Before applying an overlay, create a copy of the original image if you want to use it in future without overlays or with other overlays.
Position
Set the position and size of the overlay. When you move it with the mouse, the overlay automatically snaps into place near the center. If you do not want this, hold down the Ctrl key while moving it.
Positioning assistant
Use the positioning assistant to align the image in a corner with a specific margin, or centered vertically/horizontally.
Click 'Save' to replace the original image with the version with overlay. If you notice a mistake immediately afterwards, you can reverse the saving by clicking 'Undo' and restore the original file.
Saving settings as a setup
If you want to apply the overlay with identical settings to other images, first create a new setup on the 'Setups' tab. Enter the overlay settings you want there and save the setup. To apply this setup in future, you have two options:
- Apply to a single image: On the image's 'Overlay' tab, you can select the setup in the drop-down menu. You can adjust the settings before saving the image if needed.
- Apply to several images: Switch to the list view of the media administration. Select the images you want and click 'Apply setup' below the list view. This applies the setup to all selected images and replaces the original images. Please note that this action cannot be undone. Check beforehand on the 'Setups' tab of an image whether the settings of the selected setup meet your expectations.
Setups
Setups let you save recurring image edits as presets and apply them in future to one or more images with a single click.
A setup can perform up to three actions in this order:
- Scale image (for single images, also crop)
- Add frame
- Add overlay image

Tip: Organize your files in folders. You can create new folders at any time in the folder administration.