


Survey: Overview
To keep delighting your subscribers with your content, you should know their interests as well as possible. A popular tool for this is a survey linked in a newsletter or on a landing page.
Click 'New survey' at the top right and enter a name and, optionally, a description for the survey.
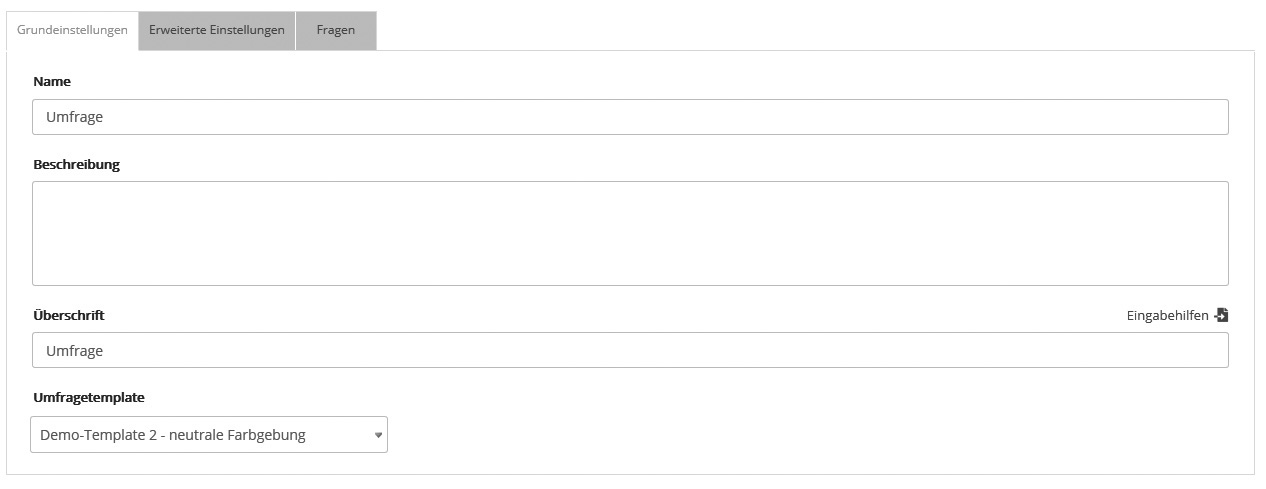
'Basic settings' tab
Here you edit the name, the description, the headline and a survey template.
'Advanced settings' tab
First decide whether you want to embed the survey link on a website (anonymous evaluation) or send it in a newsletter (personalized evaluation):
- Anonymous survey for website: To embed the survey on your website or landing page, link the displayed "URL for anonymous survey". Every visitor to your website can take part in the survey, i.e. there is no relation to emma subscribers. The survey statistics let you evaluate the totals of the answers given, without relation to individual participants. Anonymous surveys cannot be used as a condition of a survey participation target group.
- Personalized survey for newsletter: To include the survey in a newsletter to your subscribers, insert the survey link using the Input assistance ("Links" tab, then the "Filter for surveys" setting in the lower area). This inserts a link in the form [SURVEY id='3' name='Meine Umfrage'], which is automatically replaced by a personalized link for each subscriber when the mailing is sent. The survey statistics let you evaluate the totals and the answers given by each individual subscriber. You can then also filter the subscribers using a survey participation target group, for example to segment them for follow-up mailings.
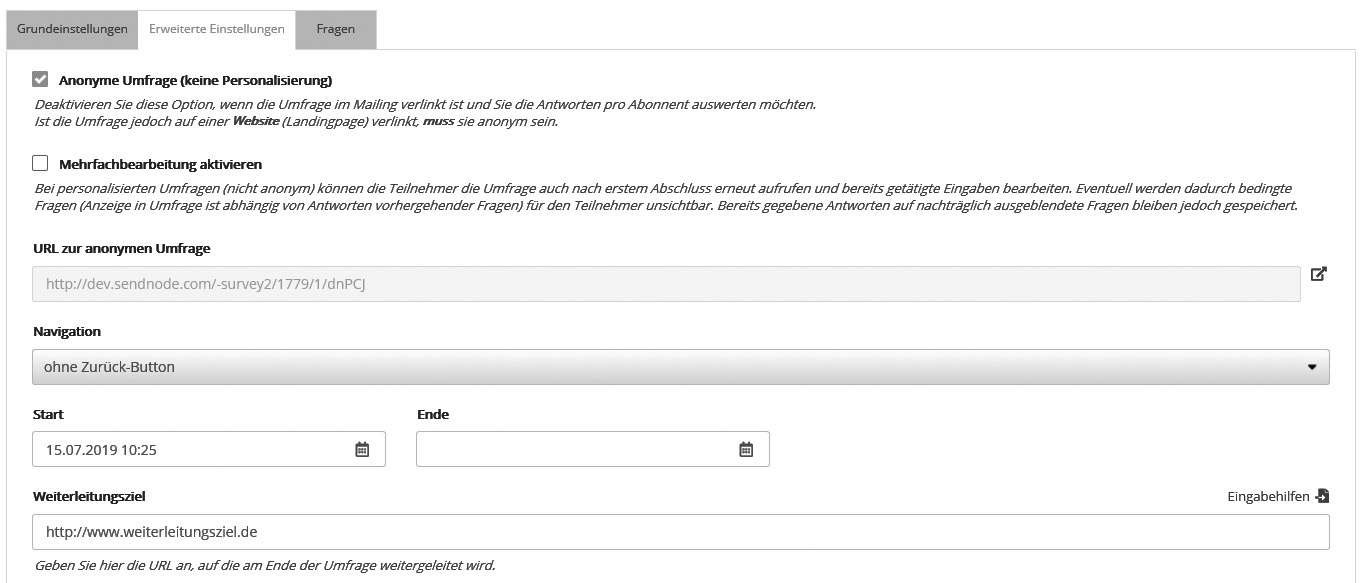
You can also create the survey with or without a back button. Set the start and end date using the small calendar icon. If a survey should never end, simply leave the fields empty.
In the last step, you can add a forwarding URL that is opened after the survey is completed.
'Questions' tab
This is where you create the actual content of your survey. To create a new question, click 'New question'. Select the question type and enter your question text in the text field below. After clicking 'OK', the new question appears in the overview.
To set further details of the question, click the 'Edit' icon. If the question type has predefined answer options, add the answers by clicking the 'Answers' link.
Questions: 'Basic settings' tab
Here you can change the question type, question text and description.
Questions: 'Advanced settings' tab
In this tab, you can define a question as a mandatory question. Note: Add an * at the end of the question text so that participants know right away that this question must be answered.
A question code is only required if, when exporting the survey statistics later, you prefer to export a code (such as a short form of the question) instead of the full question text.
If you select a subscriber field, the answers to this question are written to that field, automatically enriching your subscribers' data.
For fields of the type Single selection or Multiple selection, this enrichment only works if the answer text or the (optional) answer value exactly matches an existing option of the subscriber field. Otherwise the field is not enriched. You cannot add new field options this way.
Questions: 'Display condition' tab
For multi-page surveys, you can specify here that a question is only displayed if a certain answer was given on a previous page, or if the question was answered at all.
Two examples:
- If question 1 was answered, show question 2.
- If question 1 was answered with answer 2 or answer 3, show question 2. If answer 1 or 4 was given, show question 3 instead.
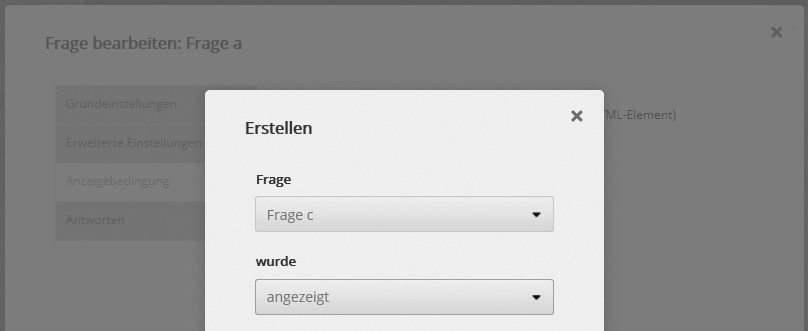
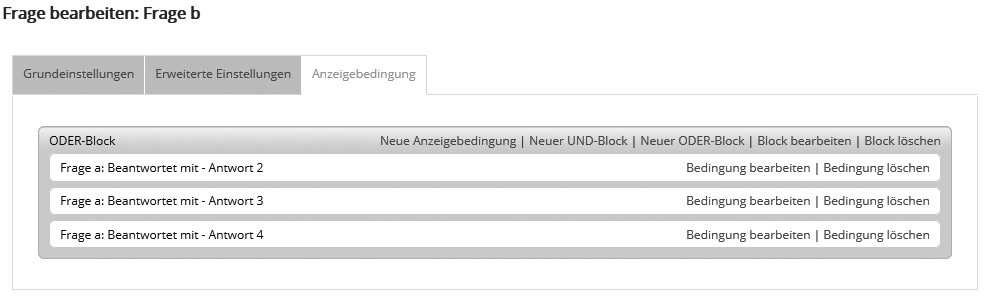
Similar to defining 'Target groups', you can define conditions in several AND or OR blocks. If you use several conditions, make sure that the logic makes sense and is applied correctly.
The following image shows an example in which question 2 is only displayed if question 1 was previously answered with answer 2, 3 or 4:
Questions: 'Answers' tab
This tab is available for question types with predefined answer options. To create a new answer, enter the answer text and click 'Add answer'.
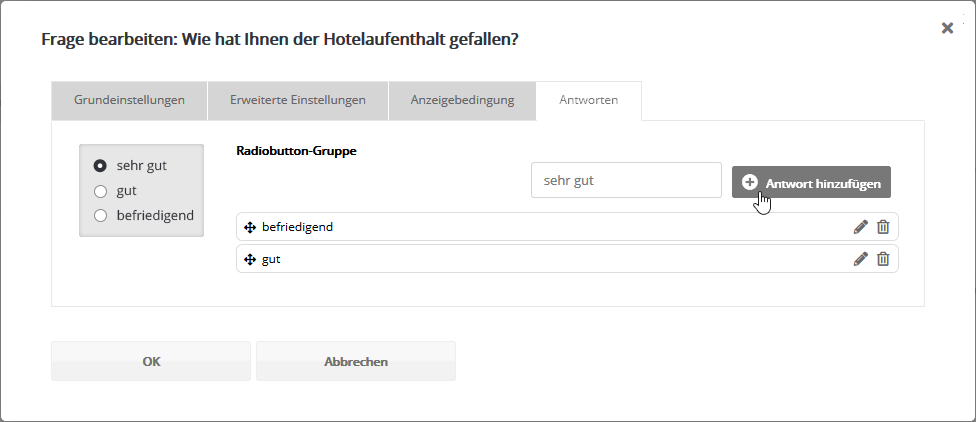
To set further details of the answer, click the 'Edit' icon. Among other things, you can enter an answer code for each answer. This is only required if, when exporting the survey statistics later, you prefer to export a code (such as a short form of the answer) instead of the full answer text.
Note: For the question types 'Checkbox group' and 'Radiobutton group', you can add a text field for an additional free answer to each answer, and you can link a specific answer to an opt-in setup. This means that if a participant gives a certain answer to a question, the opt-in process is triggered automatically.
You have now successfully created your first question.
To place a question on a separate page, click 'New page' to insert a page break. You can move your questions as you like using drag and drop.
Use the 'New HTML element' button to include HTML elements such as your logo or colored text elements.
Once you have finished creating the survey, you can test it using the corresponding button. After testing, the survey is ready to go online.
Including the survey in a newsletter
1. Inserting into an HTML newsletter
Switch to the edit mode of your newsletter and select the 'HTML' tab. Place your cursor where the survey should be inserted. Click the 'Input assistance' button and select the survey you just created in the 'Links' tab. This inserts a placeholder for the survey, for example:
[SURVEY id='1' name='Umfrage']...[/SURVEY].
Then simply enter the text between the tags that readers will see as the link to the survey.
[SURVEY id='1' name='Umfrage']Take part in our survey here.[/SURVEY]
Then click 'Save' to apply your changes.
2. Inserting into a text newsletter
To insert a survey into the text part, switch to the edit mode of your newsletter and select the 'Text' tab. Then proceed exactly as described above for the HTML newsletter.
3. Inserting into a newsletter template
Switch to the edit mode of your newsletter and select the 'Content' tab.
To insert the survey into the text, proceed as follows:
First write the text, e.g. "Take part in our survey here", and select it.
Then insert your survey using the 'Input assistance' in the 'Links' tab.
The following placeholder is inserted:
[SURVEY id='1' name='Umfrage']Take part in our survey here.[/SURVEY]
To insert the URL of a survey for the type Link, proceed as follows:
Insert the placeholder for the survey into the link URL input field using the 'Input assistance' (under Links).
The placeholder [SURVEY id='1' name='Umfrage' /] is inserted.
We are working on improving the input assistance to make this easier for you in the future.
Click 'Save' to apply your changes.
4. Inserting into your own website
To link to your online survey, use the survey URL. Select your survey and switch to the 'Advanced settings' tab. The survey URL is the second item from the top.